
This guide walks you through the first time you open CarePilot, in the same order the app asks you for things. It takes a few minutes: the app carries you from one screen to the next, and all we do here is explain what you do on each one, and why.
1. Accept how we look after your privacy
Read and accept to begin
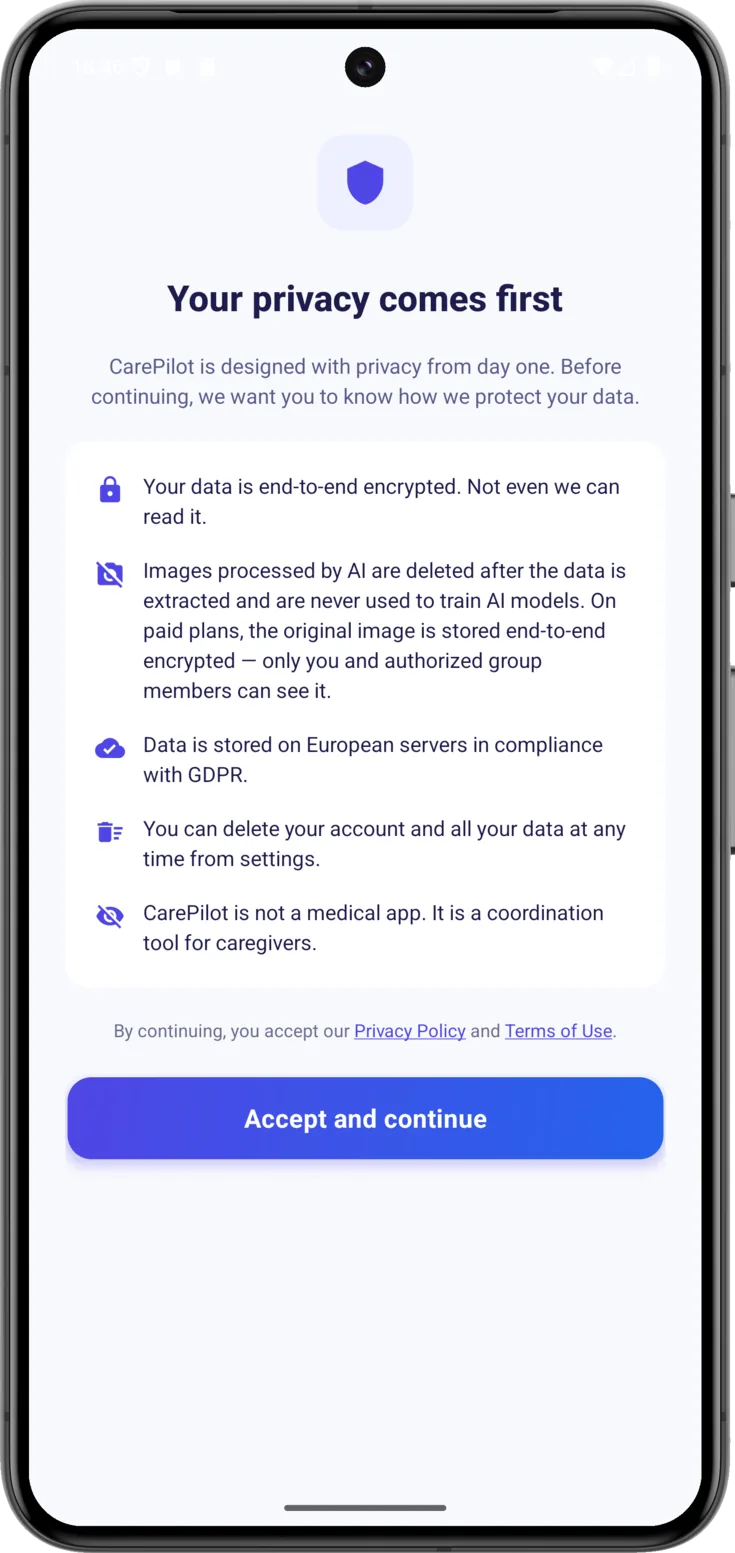
The «Your privacy comes first» screen sums up in five points how your data is handled, and it is worth reading them calmly. Two of them are worth understanding properly: that your data is end-to-end encrypted means that it is so well protected that not even we can read it, and that CarePilot is not a medical app means that it is a tool for coordinating among caregivers. And if you are wondering what that GDPR mentioned there is, it is the European data protection law.
By tapping «Accept and continue» you also accept the Privacy Policy and the Terms of Use, linked just above. This screen only appears this first time.
2. Create your account
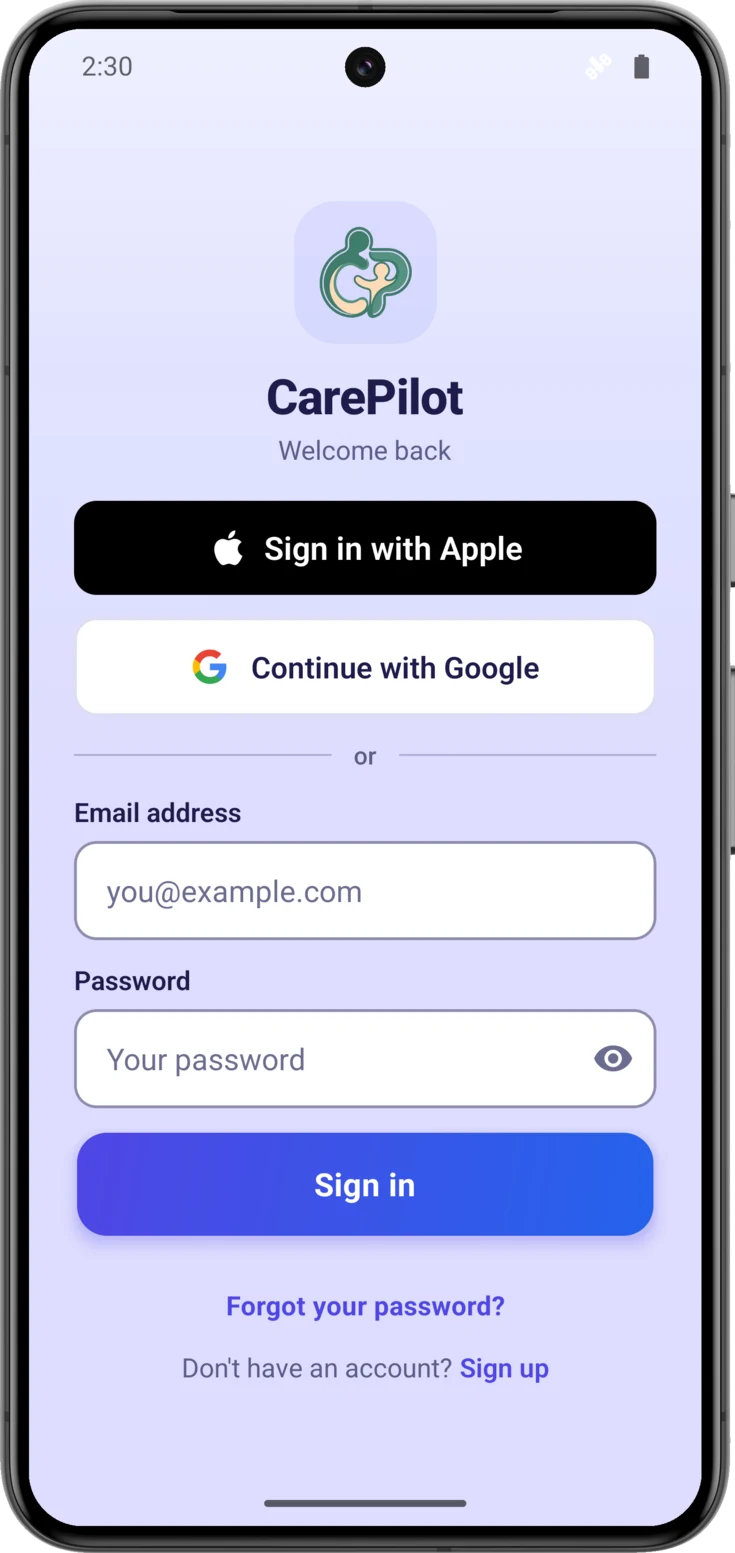
Your account holds your access: you always sign in with it, even if you change phones. The first thing you will see is the «Welcome back» screen. That title is misleading, because it sounds as though you had to have signed in before: that is not the case. It is also the screen you start from scratch on.
There are three ways to sign in and all three are equally good: «Continue with Apple», «Continue with Google» and your email with a password. The first two are more convenient, because you don’t have to invent or remember any new password, and they also leave your email confirmed, so they save you section «3. Confirm your email».
Go to the sign-up screen
If you are going with email and password, don’t fill in anything at the top: that part is for people who already have an account. Scroll down to the bottom of the screen and, where it says «Don’t have an account?», tap «Sign up».
And if you already had an account but can’t remember the password, «Forgot your password?» is right there, and it sends you an email so you can set a new one. Don’t confuse it with the PIN in section «6. Protect your data with a PIN»: they are two different things and each one is there for its own purpose.
Fill in your details
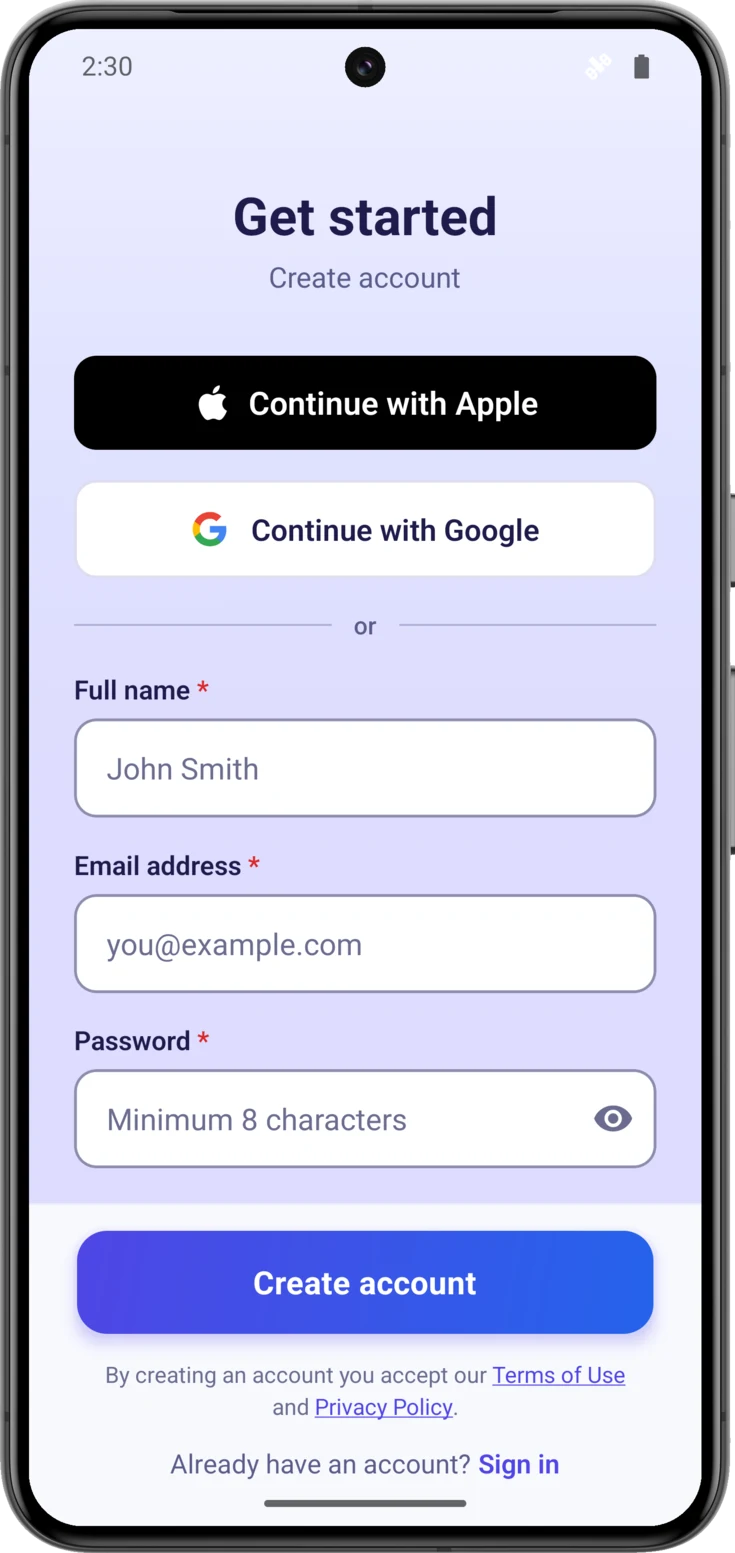
On «Get started» there are three fields: your «Full name» —the one the other caregivers will see next to whatever you write down—, your «Email address» and a «Password» of at least eight letters or numbers. Choose one you will remember but that isn’t obvious.
Create the account
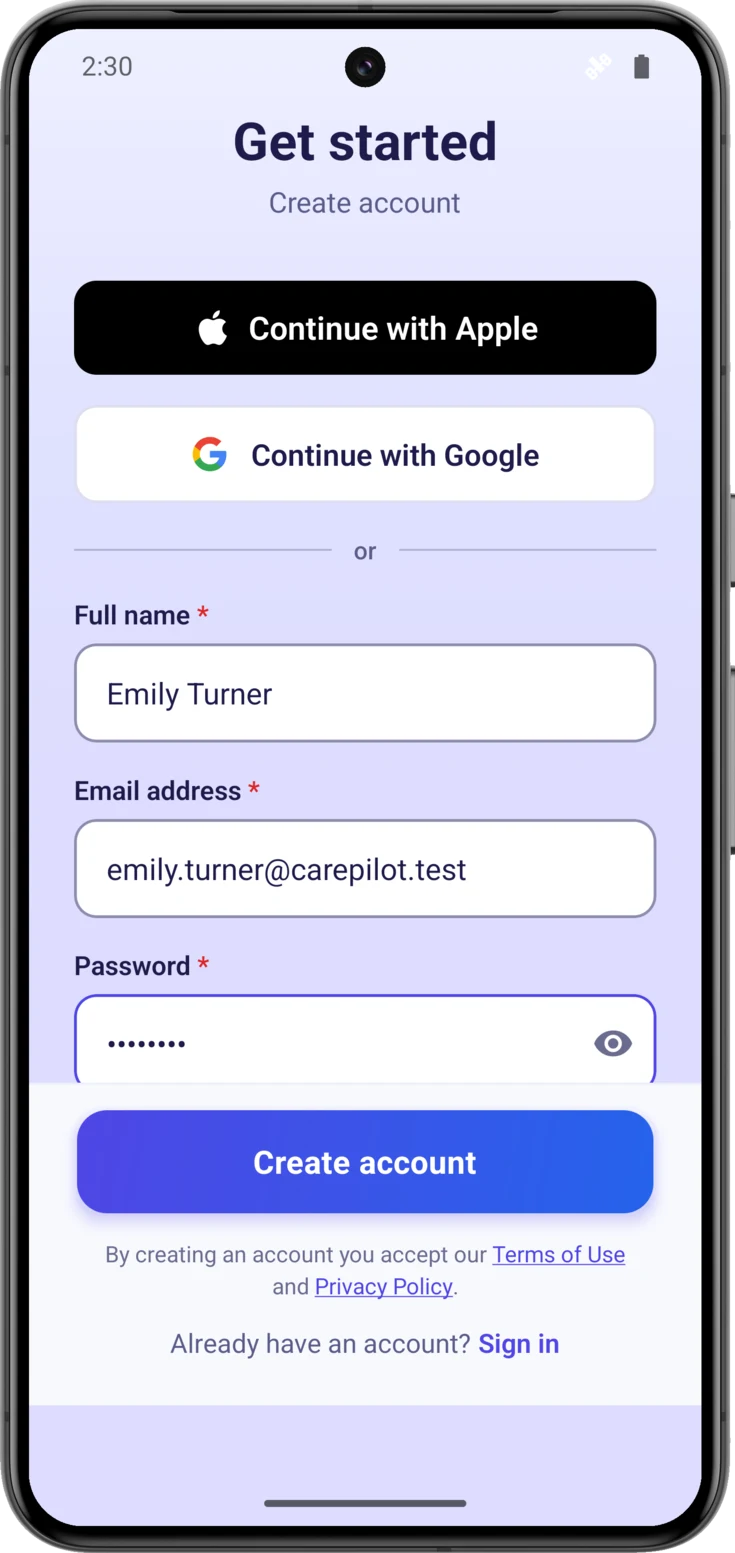
With the three fields filled in, tap «Create account». In doing so you accept the Terms of use and the Privacy policy, which are linked just above the button in case you want to read them first.
3. Confirm your email
Confirming it is the way of checking that the mailbox is yours. When you create your account with email and password, a verification email is sent to you, but you don’t have to confirm it now in order to carry on: you can continue with the following steps and do it whenever it suits you.
4. Choose how to start
A group is the shared space where the care of one person is coordinated. With your account created, the app takes you to «How do we start?» so you can decide whether you set it up yourself or come into one that already exists. There is no wrong option: it depends on your situation.
Create a group or join one
Tap the card that matches your case. If nobody has given you an invitation code, yours is «Create a group», because «Join with a code» only works when you already have that code in your hand. By joining you don’t create anything: you add yourself to what is already there.
This screen is not only the one for your first day.
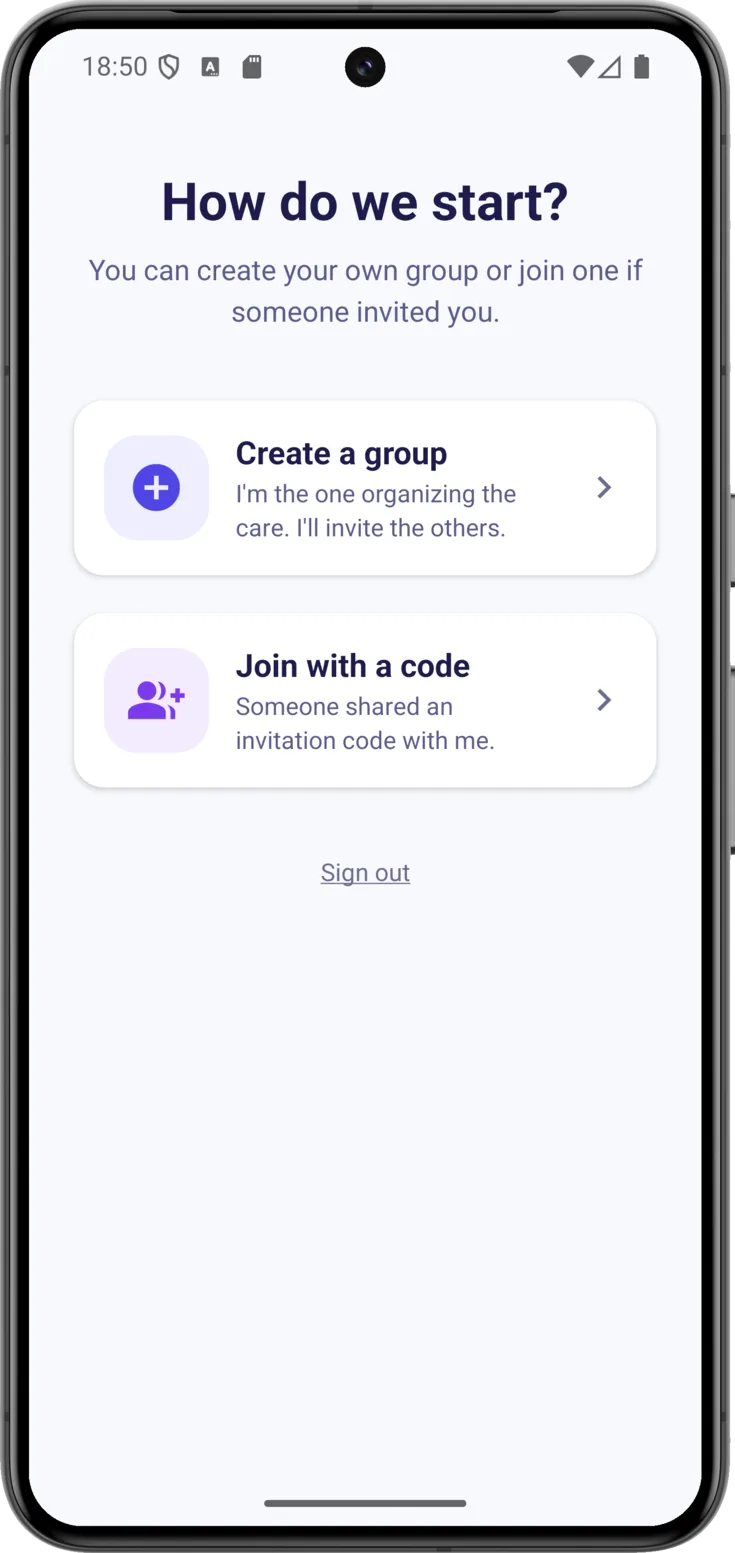
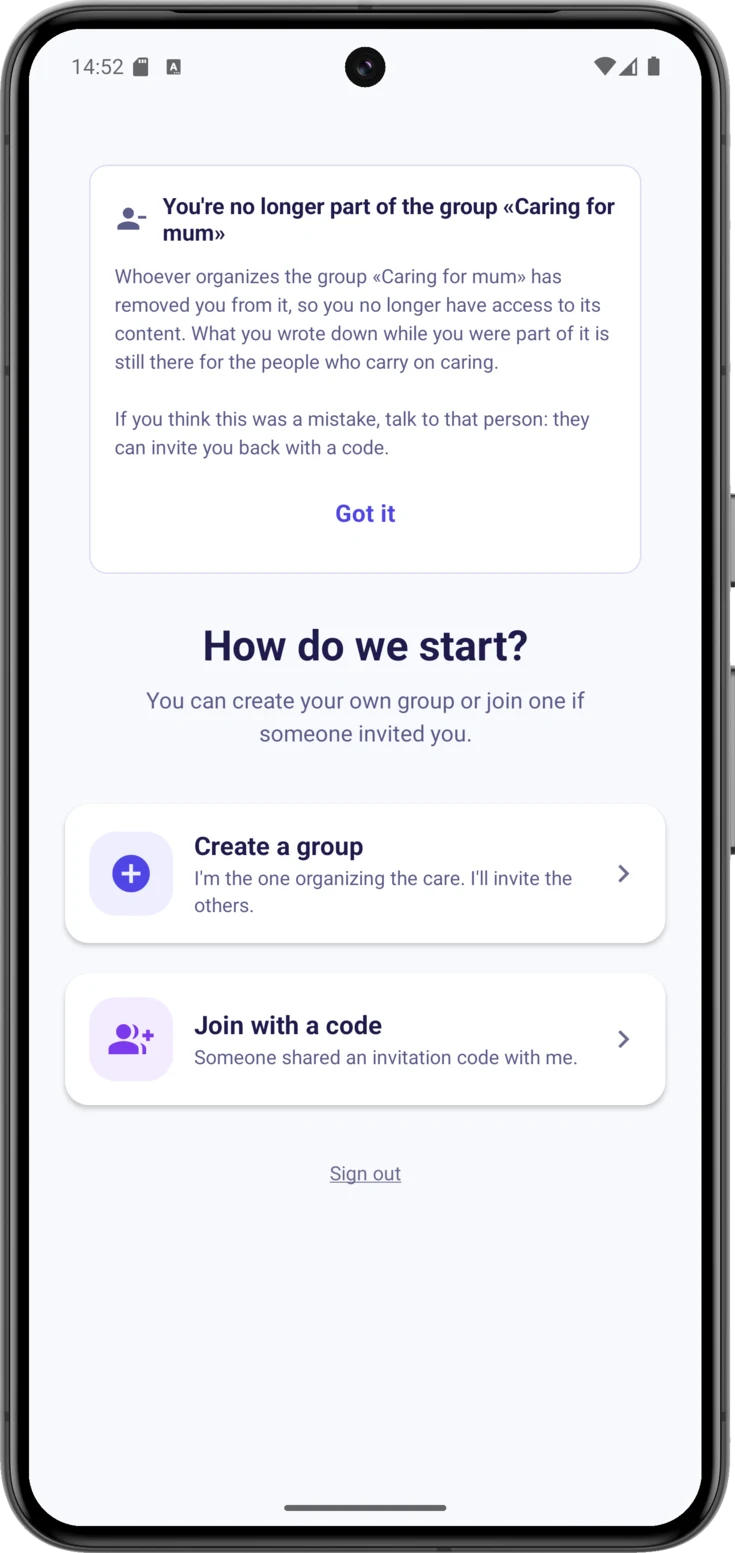
The same screen, if you end up with no groups
This is also where you land if at some point you end up with no group at all: because you left the last one, because the person who organized one removed you, or because the group closed when its deadline came round.
You have not lost your account and you have not been signed out. You are still inside the app, with your email and your keys, and up at the top a card is waiting for you telling you what has happened and with which group, so that you don’t have to work it out for yourself. Underneath, the same two options as always, in case you want to start again.
5. Create or join your group
Depending on what you chose, read only the section that applies to you.
If you create a group
Name the group and the person being cared for
Two names: the «Group name», which is what you will all call it between you —«Grandma Mary’s family», «Caring for John»—, and the name of the person being cared for. They are the only required fields: with those two you can already carry on.
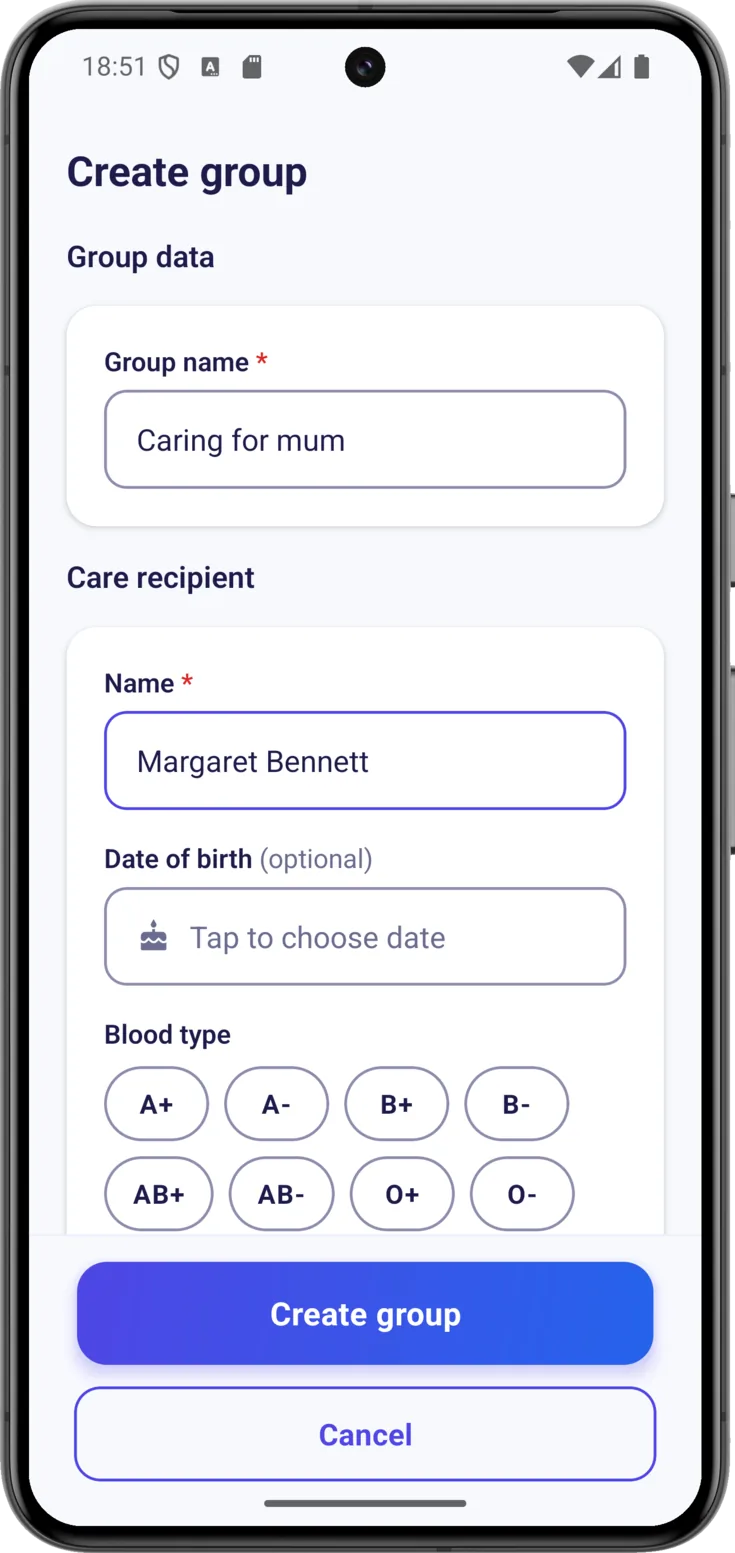
Add their details (optional) and create
Below, you can go on completing the medical and contact details: date of birth, blood type, allergies, conditions, phone numbers… All of this is optional and can be filled in later on from Group, the button right at the bottom, so it doesn’t have to be perfect now. When you have it, tap «Create group».
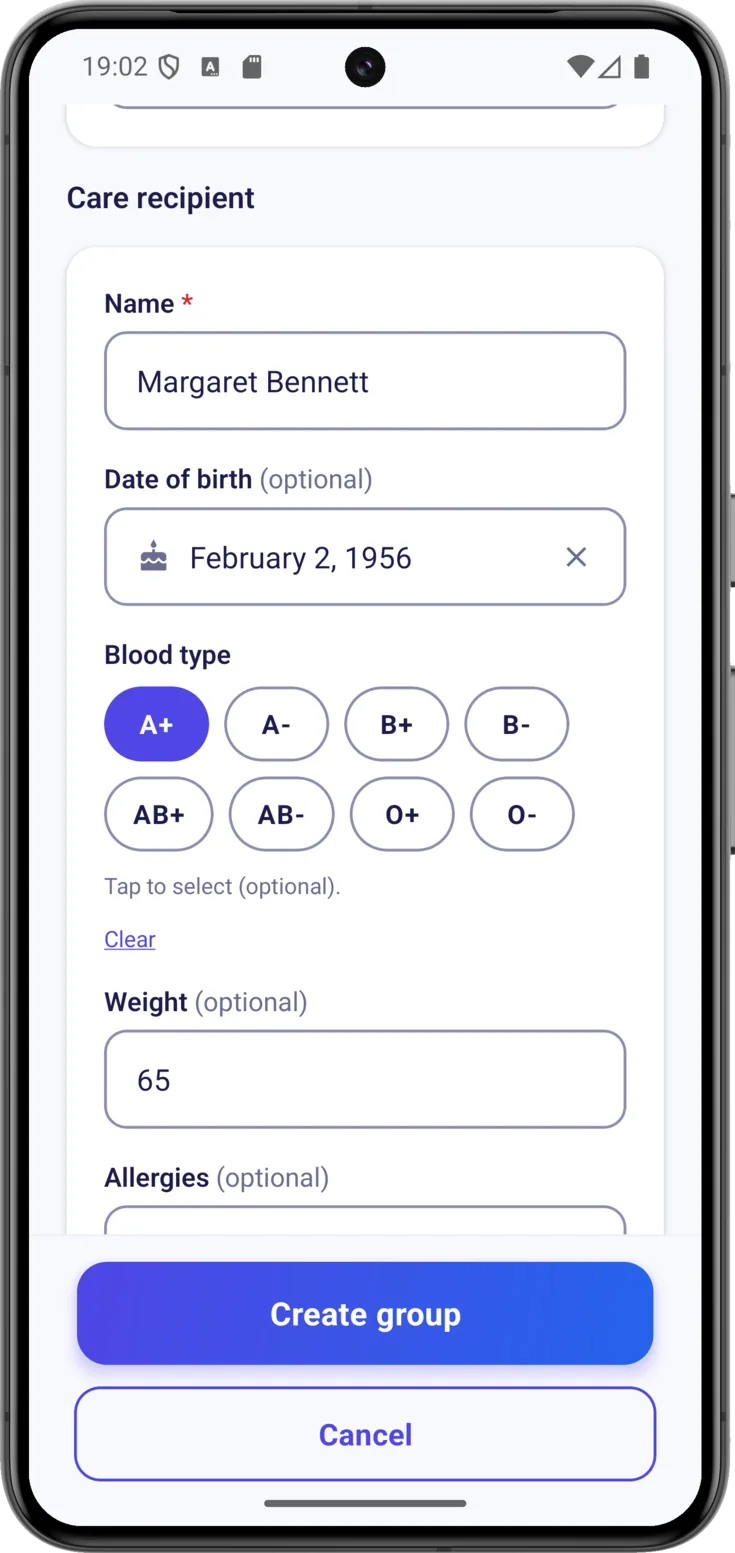
If you join with a code
Enter the code and join
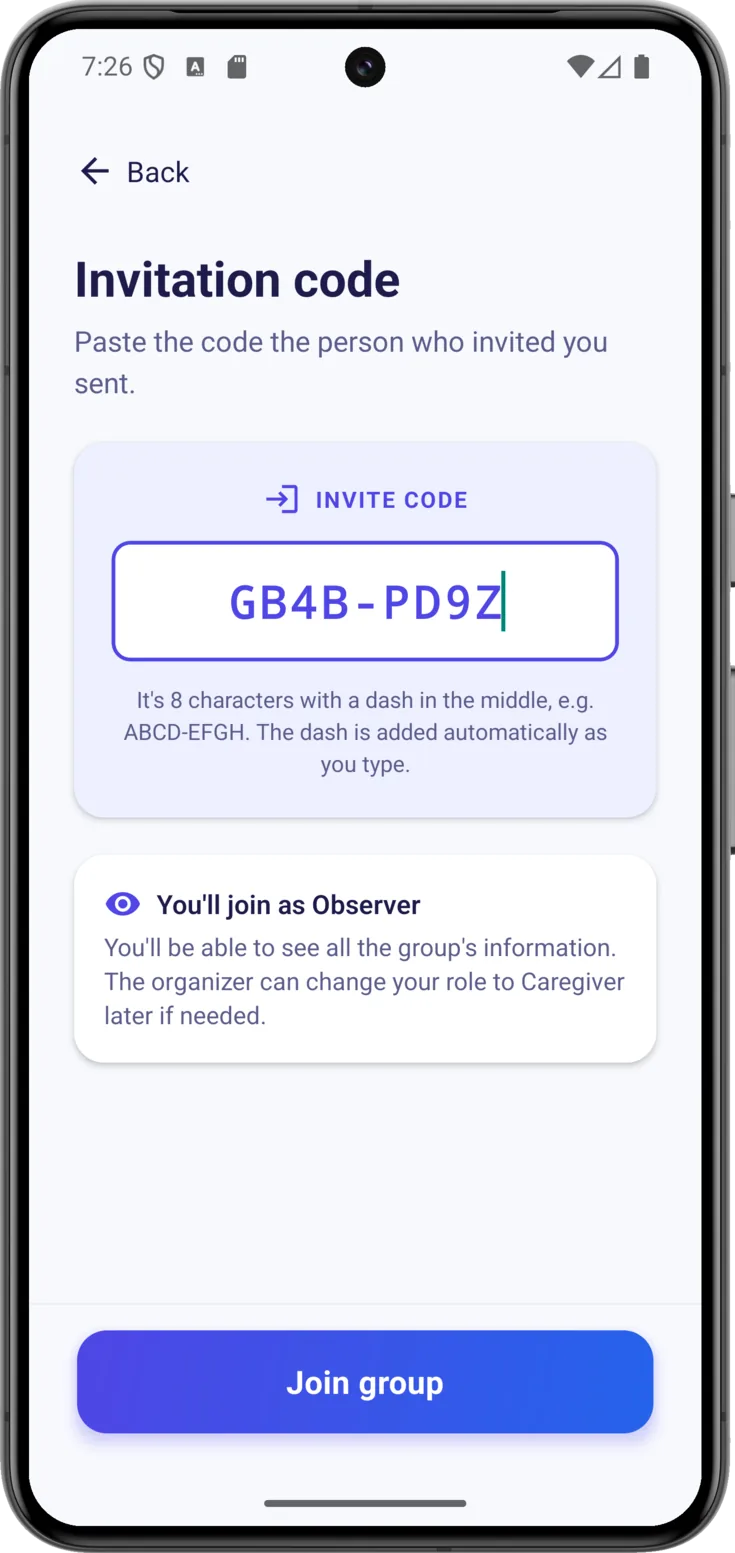
In «Invitation code», type the one the person who organizes the group has given you, or paste it just as it is: it doesn’t matter how you type it, because the dash and the capital letters are added on their own.
Then tap «Join group». You come in as an Observer: as the screen itself warns you, you will see everything in the group but you won’t be able to change anything until the person who organizes it gives you more permissions.
It can happen that the code is correct and it still doesn’t let you in, because that group already has a closing date. You have not copied anything down wrongly: it is the state the group is in, and the app tells you so in those words. The way out is to talk to the person who organizes it, who can withdraw the closure and invite you again.
Or join by scanning the QR code
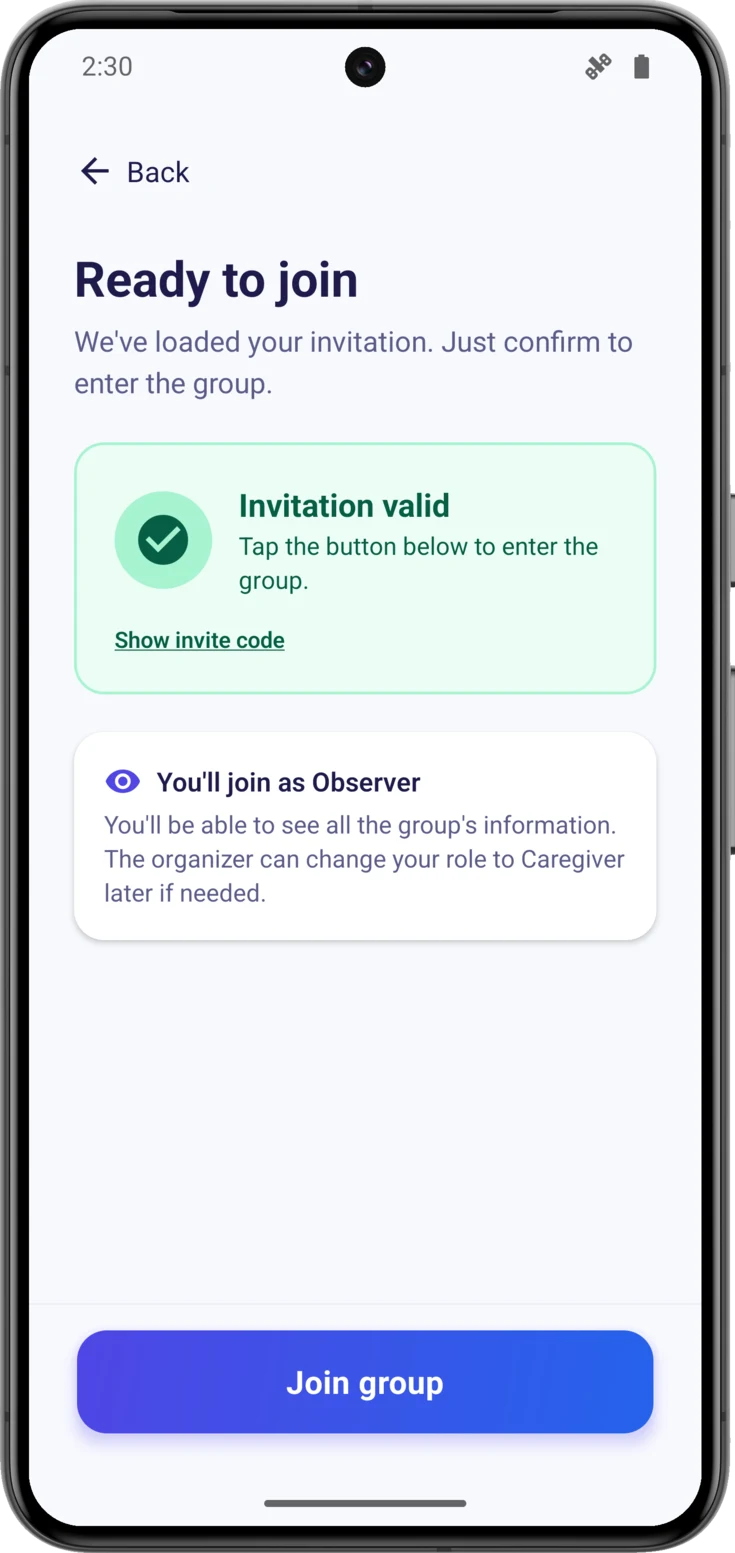
If you are next to the person inviting you, ask them to open «Show QR» —that square full of black dots— and point your phone’s camera at it: CarePilot opens on its own on «Ready to join», with a green card that says «Invitation valid» and the code already loaded. Here you don’t type anything: check that you are coming in as an Observer and tap «Join group».
For the QR code to do this, the app has to be installed already: what it does is open it, not take you to a web page. On iPhone the camera recognizes the code and opens CarePilot directly. On Android it depends on the reader your phone comes with: some open the app and others do nothing at all when you scan it. If yours doesn’t react, it isn’t that the code is wrong — ask for it written out and paste it in by hand, which is the route that always works.
6. Protect your data with a PIN
This is the most important step, and it cannot be left for later.
Think of your care data as a safe that only you have the key to: it is end-to-end encrypted, so not even we can open it. That is good for your privacy, but it means that if one day you change phones, nobody can open it for you. The recovery PIN you are about to set is that key, and that is why the app stops here and won’t let you through without setting it.
Choose your PIN
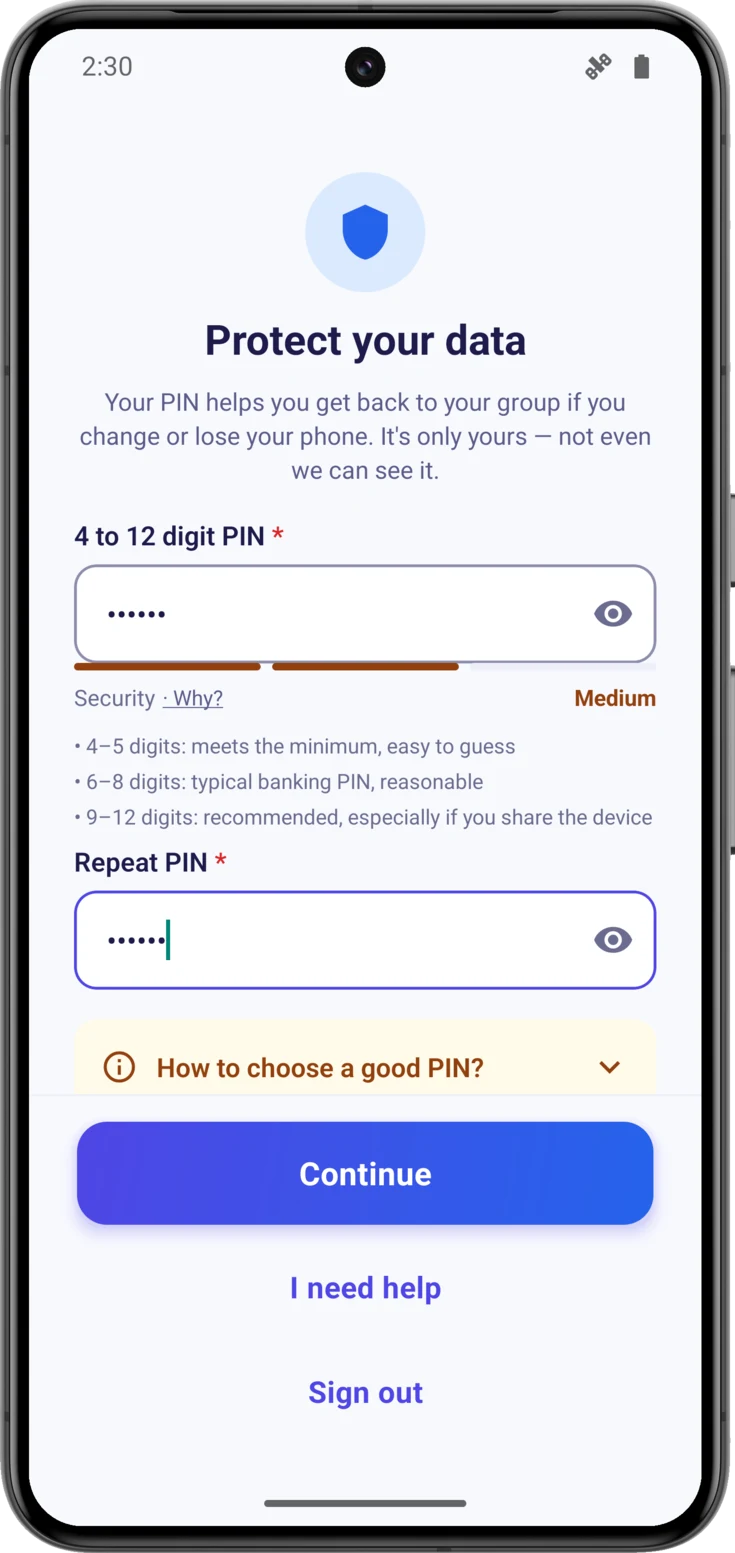
On «Protect your data», type a PIN of 4 to 12 digits. A «Security» bar tells you how hard it is to guess, and «Why?» shows you the ranges you can see in the screenshot. The rule is simple: the more digits, the safer, and from six onwards you are already in reasonable territory.
The important thing is that it should be a number you will remember without fail, not one so elaborate that you forget it. If you get stuck, at the bottom you have «I need help», which writes to us, and «Sign out» in case you signed in with the wrong account.
Repeat the PIN and continue
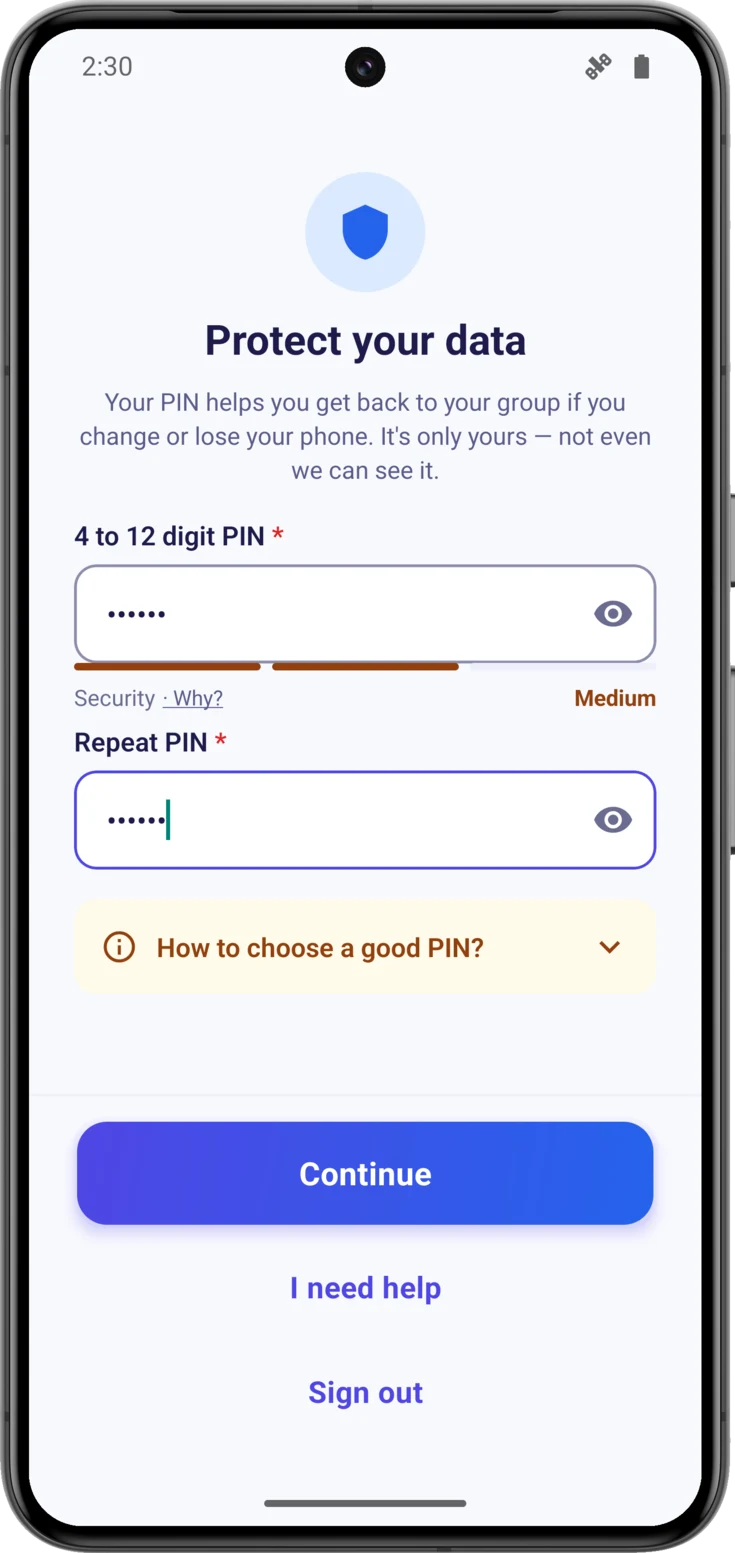
Right below, on that same screen, is «Repeat PIN»: type the same number there and tap «Continue». Being made to repeat it is deliberate, so that a PIN with a typo that you then don’t know doesn’t end up saved.
7. The permission to notify you and the welcome tour
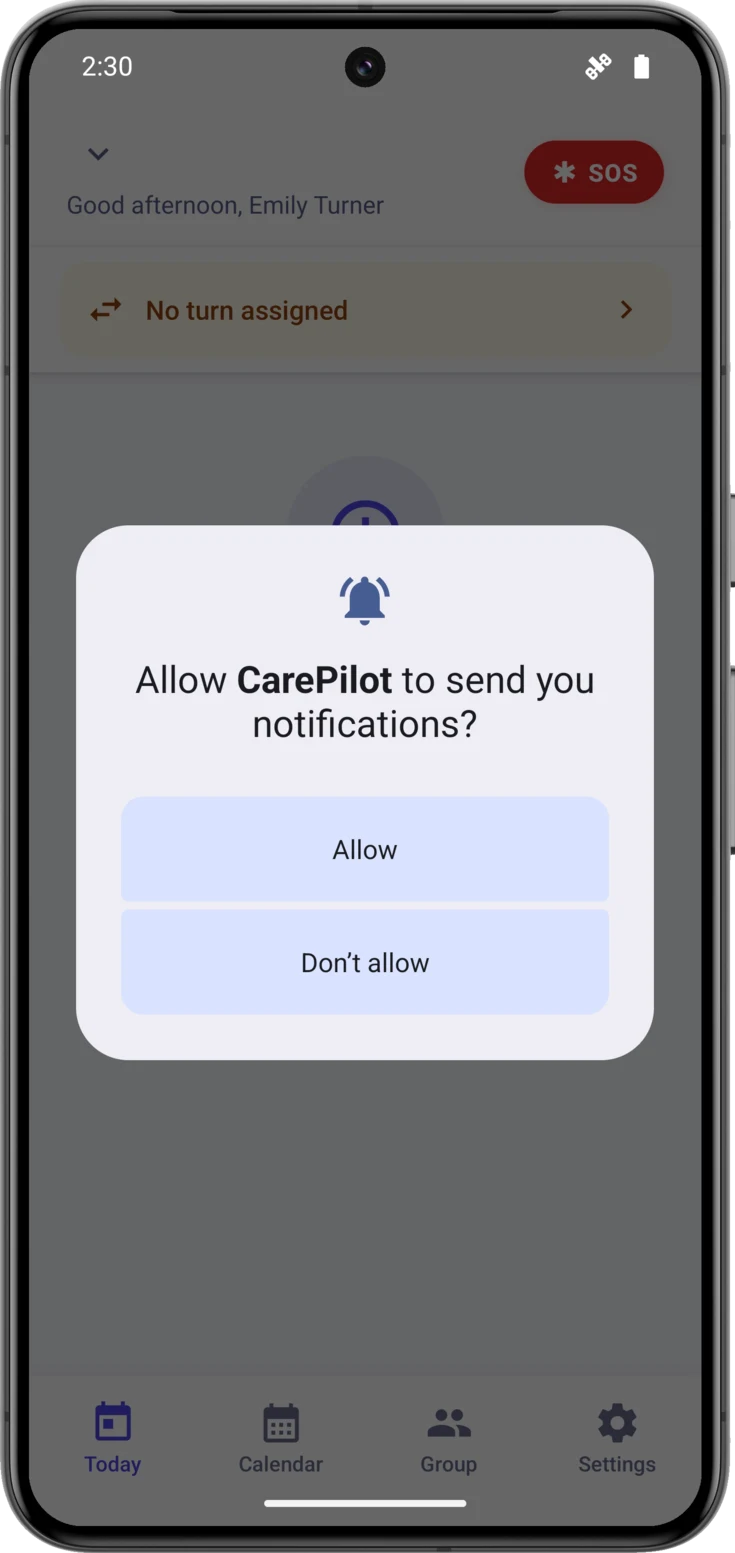
The first time you reach the main screen, two things come up one after the other: the notification permission and a welcome tour.
The phone will ask for permission to notify you
As soon as you arrive at Today, the phone asks whether CarePilot can send you notifications. Say yes, by tapping «Allow».
It isn’t advertising: these are the reminders for doses and appointments, and the alerts about what is being left undone. If you say no by mistake, no reminder will reach you until you put it right, and that is the number one cause of «the app doesn’t notify me». It is sorted out in a moment from Settings.
And right behind it, the welcome tour
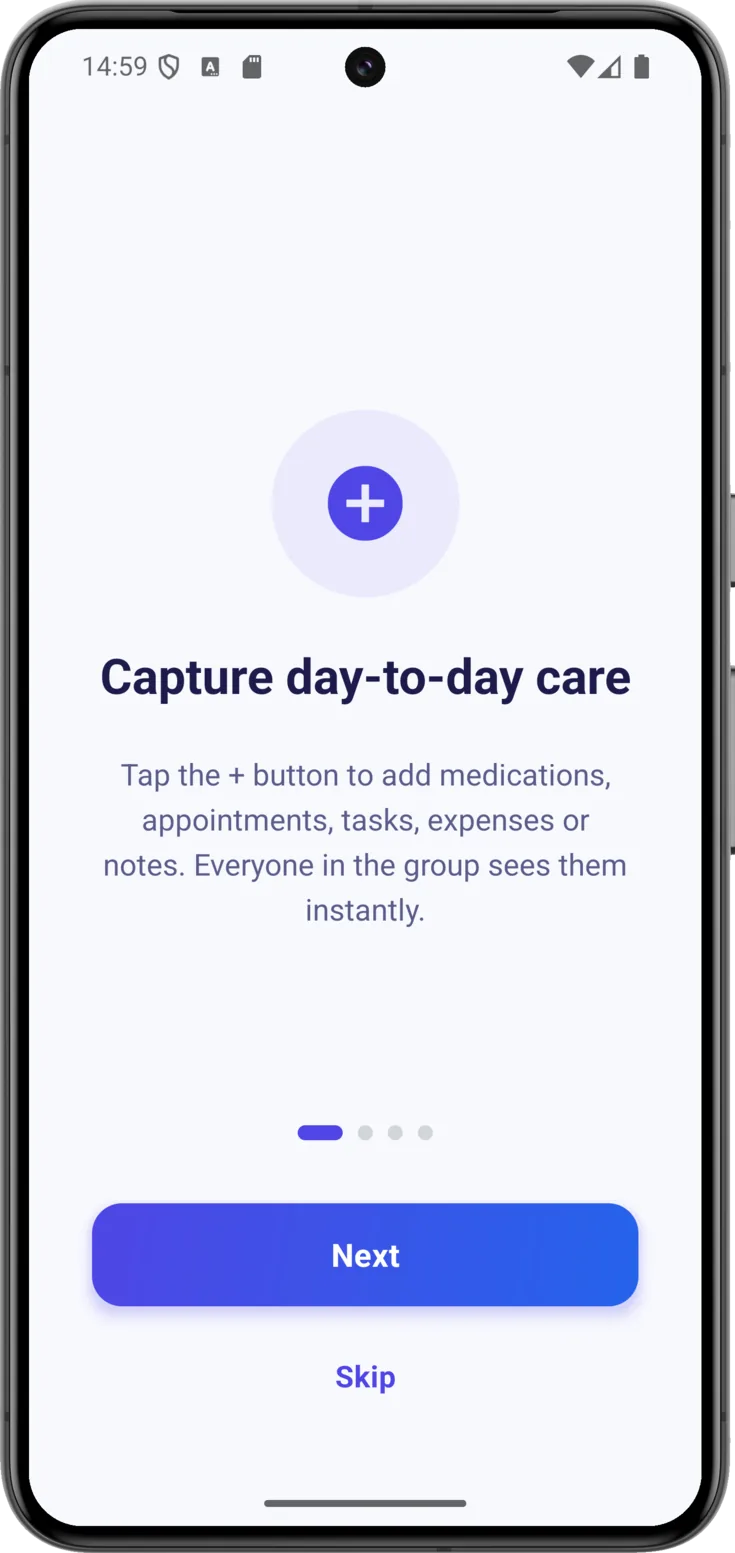
It is four screens in a row that introduce the essentials:
- Capture day-to-day care — with the button you record medications, appointments, tasks, expenses or notes, and the rest of the group sees it instantly.
- Scan prescriptions with AI — you take a photo of a prescription, an appointment letter or a receipt and the app fills in the details for you.
- Hand off care between people — when someone else takes over, you pass them the turn from the turn banner, which is the bar that announces it at the top. That way it is always clear who is in charge.
- End-to-end encrypted — the reminder that everything is encrypted and that the PIN you have just created already protects it.
You move on with «Next» or by swiping, and the little dots underneath tell you how far along you are. On the last screen the button changes to «Get started». If you would rather skip it, you have «Skip». This tour appears only once.
And that’s it: you are inside, on the Today screen. From here on, each guide in this manual explains one module of the app, so you can discover them one at a time.