
Caring for someone also costs money, and it is normally paid by whoever happens to be there at the time: the pharmacy today, a taxi to the clinic tomorrow. When several people are making those payments, it is easy to lose track of how much has been spent and of who put in what. Here each thing is written down and the app keeps the books.
Four pieces of information are stored for every expense: how much it was, what type it is, when it was paid and who put in the money.
The expense list
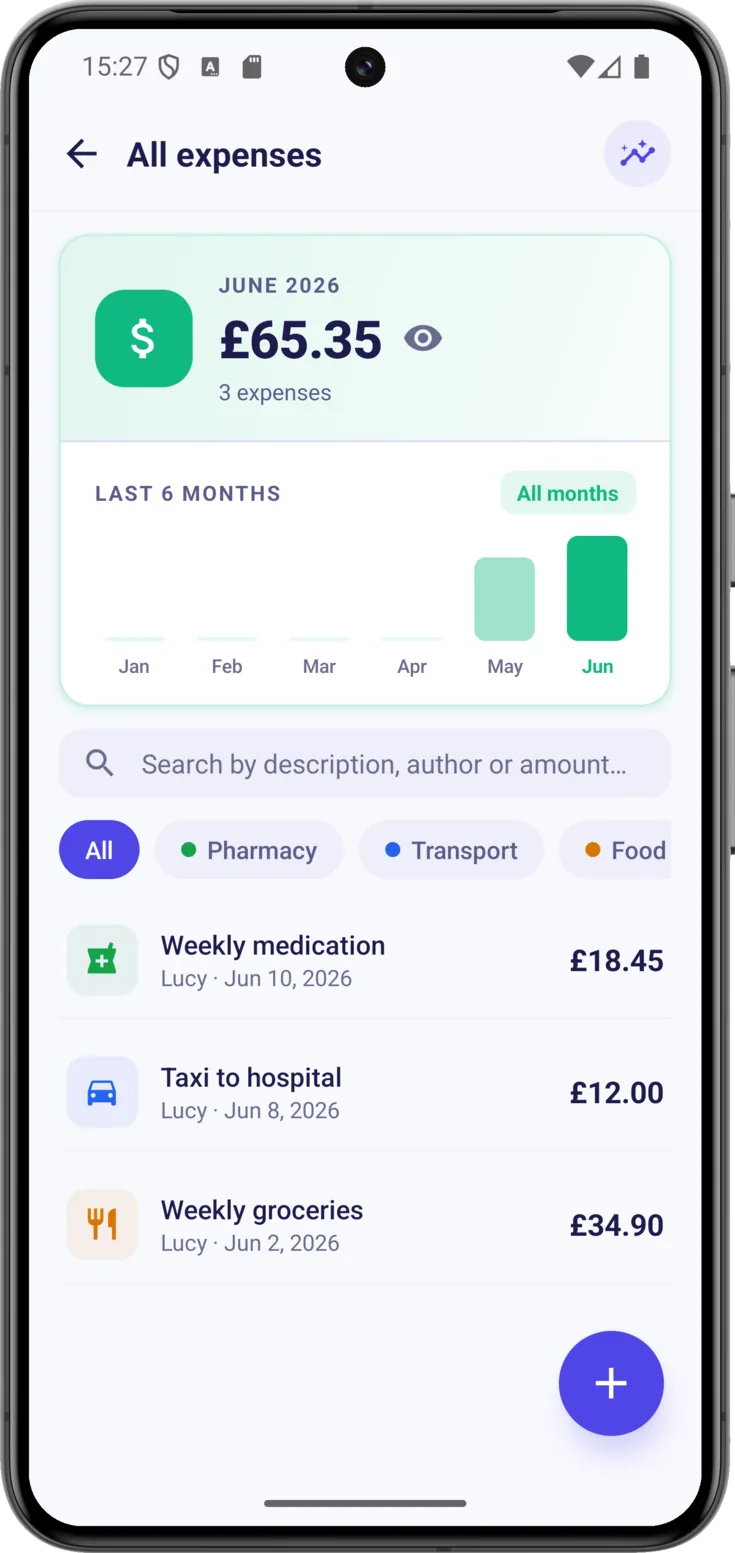
At the top you have the month you are looking at in big letters, that month’s total and how many expenses make it up. With Plus or Pro there is also a bar chart of the last few months, which tells you at a glance whether more or less is being spent than before.
Search and filter
The search looks at the description, the name of whoever paid and the amount all at once, so it works whether you remember what the expense was for or only the figure.
Below it, the category filters leave in view only the expenses of one of them, and the «With photo» filter only those that have the receipt photographed.
Writing down an expense
Open the form
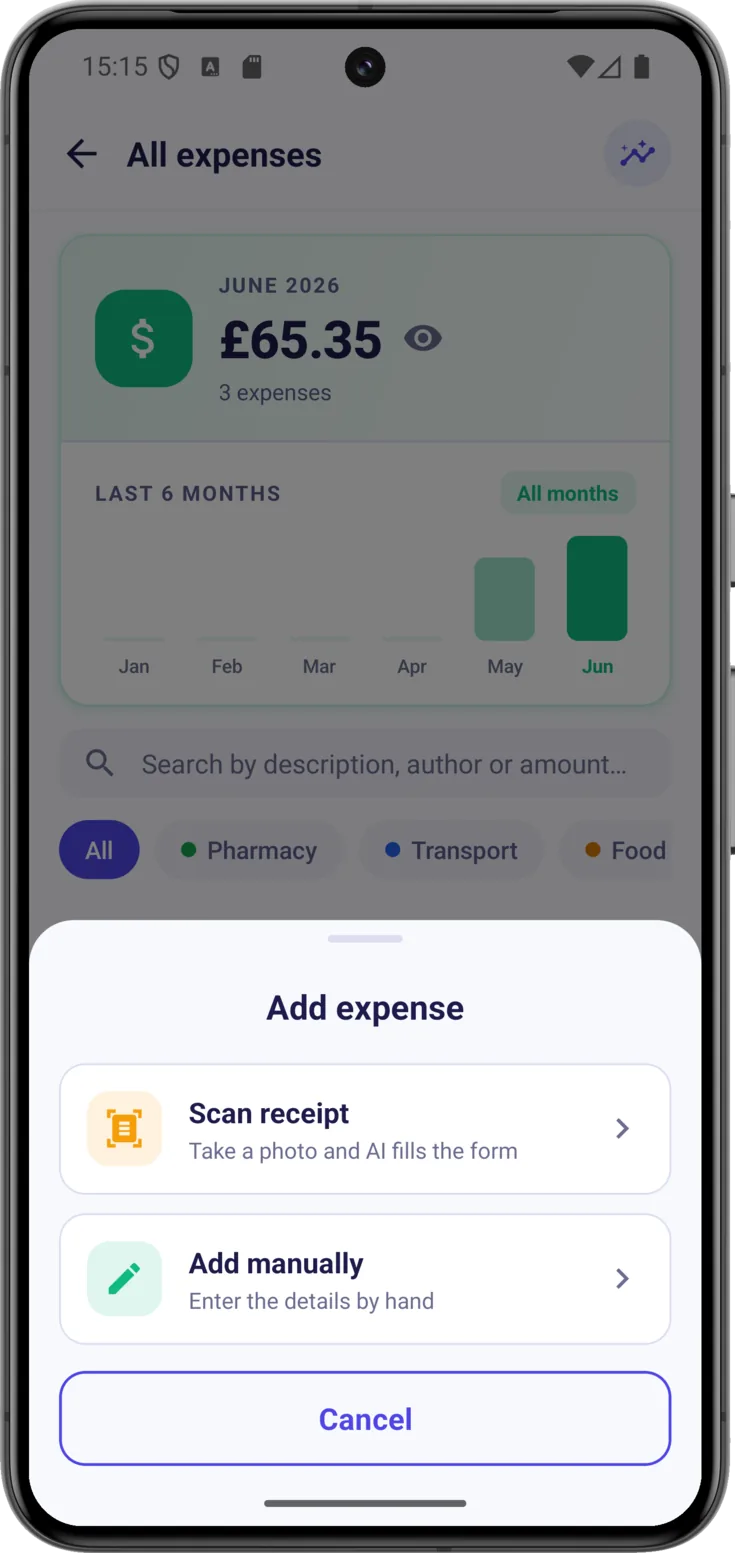
Tap the button at the bottom right. If your role can scan, the app lets you choose between «Scan receipt» and «Add manually».
The second route, which for many people ends up being the usual one: the + on the Today screen, where «Expense» sits under «Or add manually». It is the same form, and that way you write the expense down as soon as you get back from the pharmacy, without having to go looking for the section.
Fill in the details
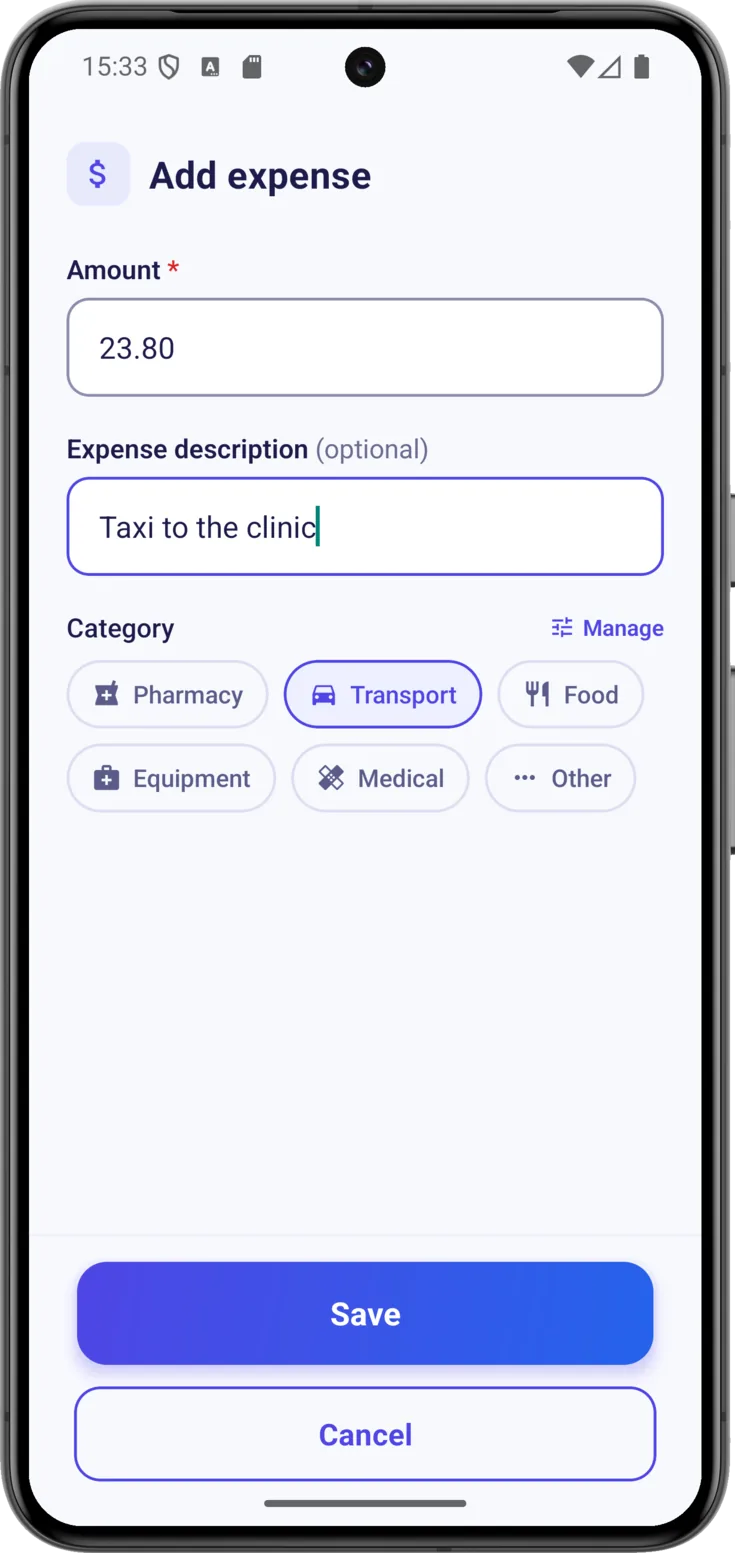
The only required field is the «Amount», which is recorded in the group’s currency. The «Expense description» is optional, but it is worth writing: a short note such as «blood pressure pills» will mean that a few weeks from now you know what each figure was.
Then choose a «Category»: the form arrives with «Pharmacy» already selected, so change it if the expense was for something else. That is what later lets you see how much goes on pharmacy each month. And if there are several of you, set «Paid by» so that there is a record of who put in the money: that is not mistrust, it is what makes settling up at the end easy.
Or scan the receipt
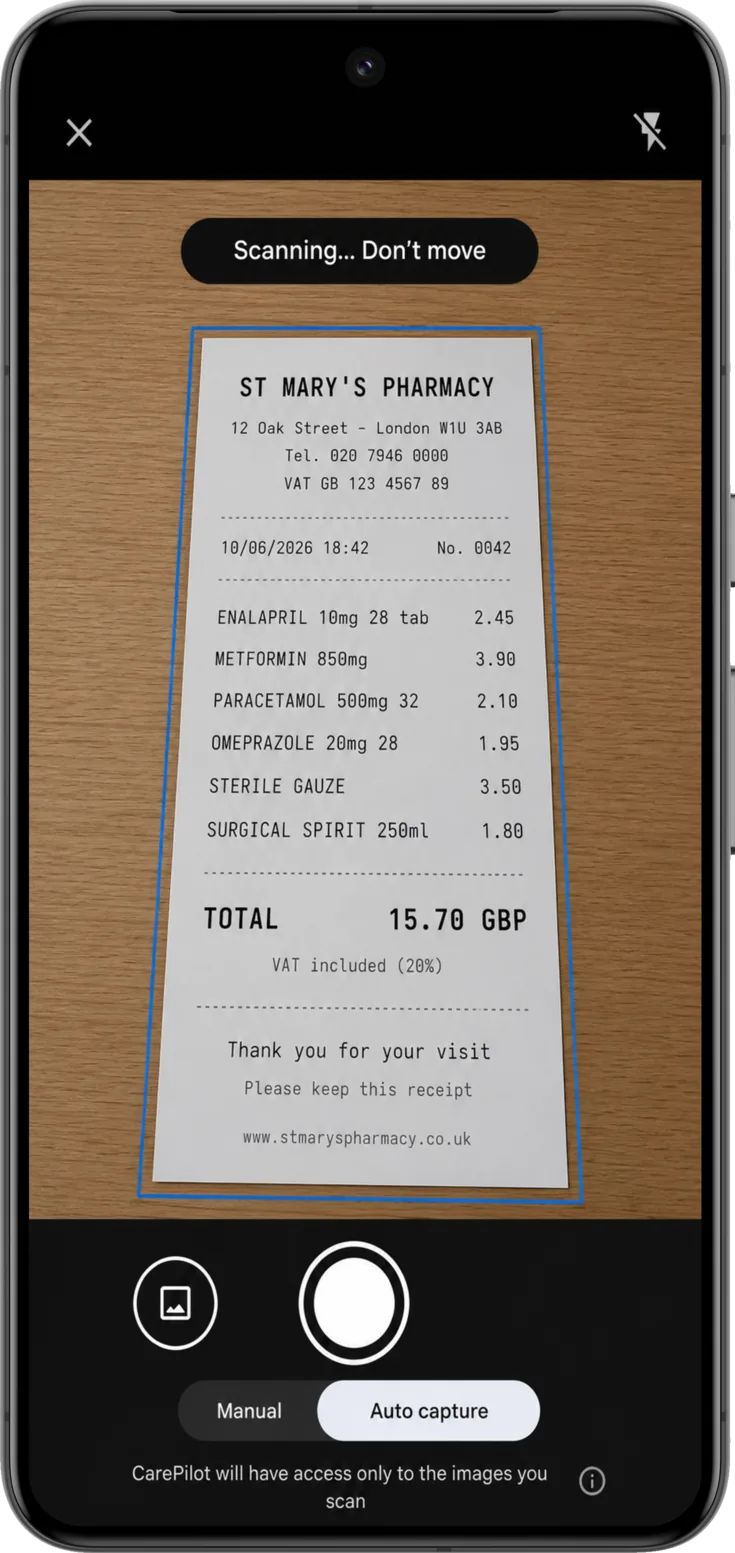
With «Scan receipt» you take a photo of the receipt and the artificial intelligence reads the amount and the details for you. It works just like the scanner for prescriptions, which you have in full in Scan with AI, and it also keeps the photo of the receipt saved for you.
Check the category before saving. When you come back from the scanner, the form always arrives with «Pharmacy» set, whatever the receipt was: the artificial intelligence does not work it out, it is a fixed starting value. If the receipt was from the taxi and you do not change it, the analytics by category will tell you that everything goes on pharmacy.
The categories
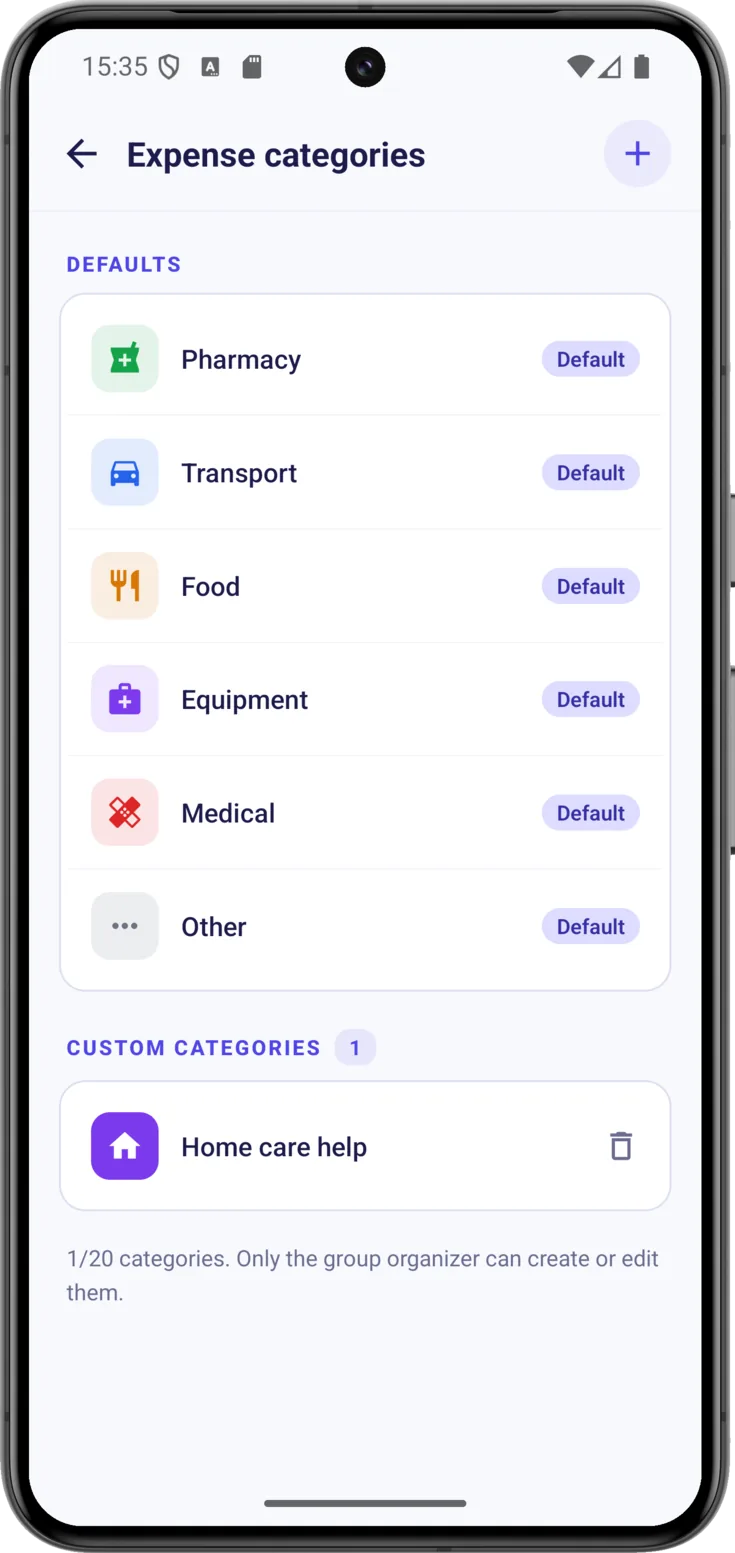
CarePilot comes with six ready-made ones, which cannot be changed: Pharmacy, Transport, Food, Equipment, Medical and Other.
Open «Expense categories»
There are two ways in: while you are writing down an expense, with the «Manage» link that sits next to «Category»; or from Analytics, with the categories icon at the top right.
Inside you will see the six built-in ones, marked as «Default», and below them your «Custom categories».
Give it a name, a color and an icon
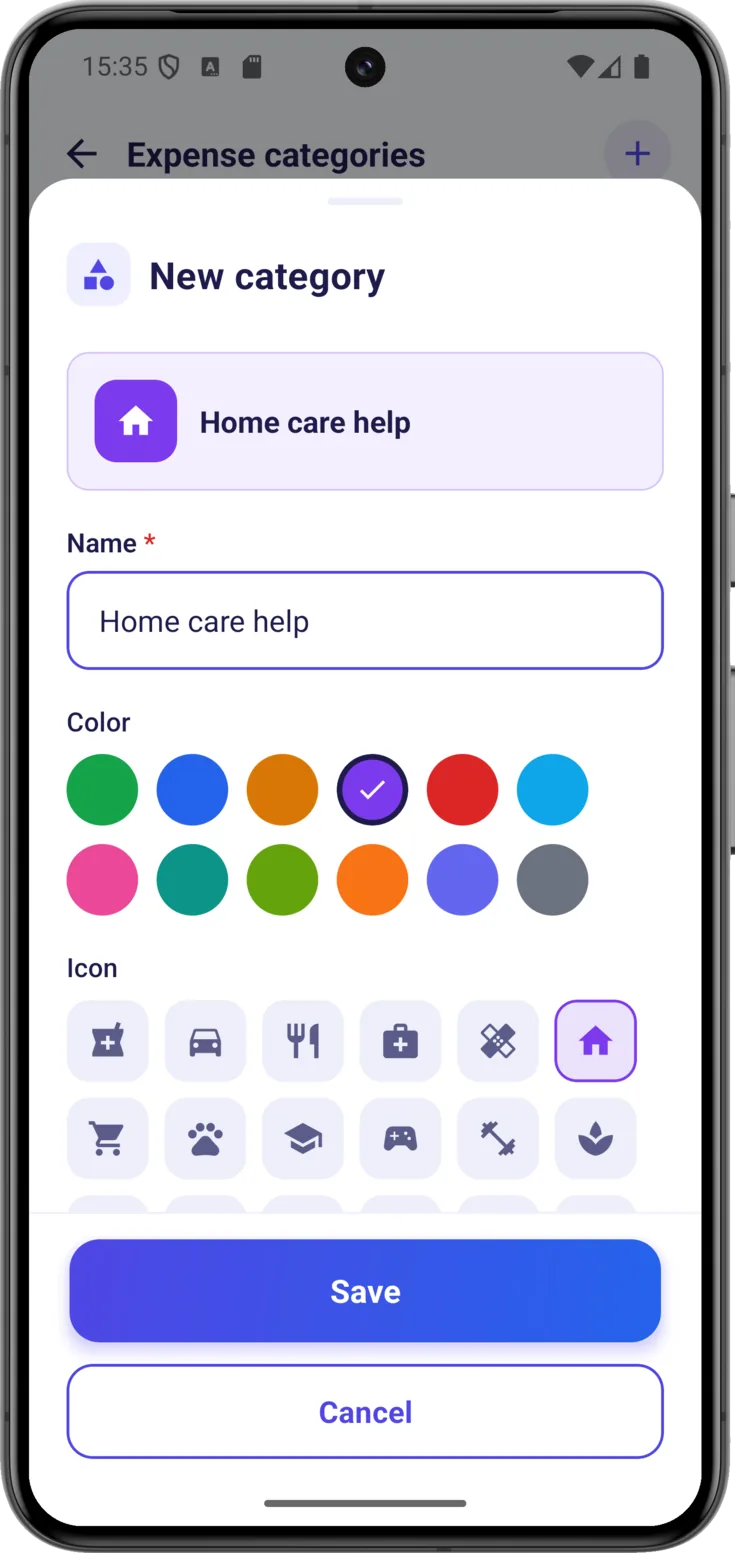
Write the «Name» —«Home help», for example—, choose a «Color» and an «Icon» so you recognize it at a glance, and save. From then on you will have it when writing down any expense, just like the built-in ones.
Viewing, editing or deleting
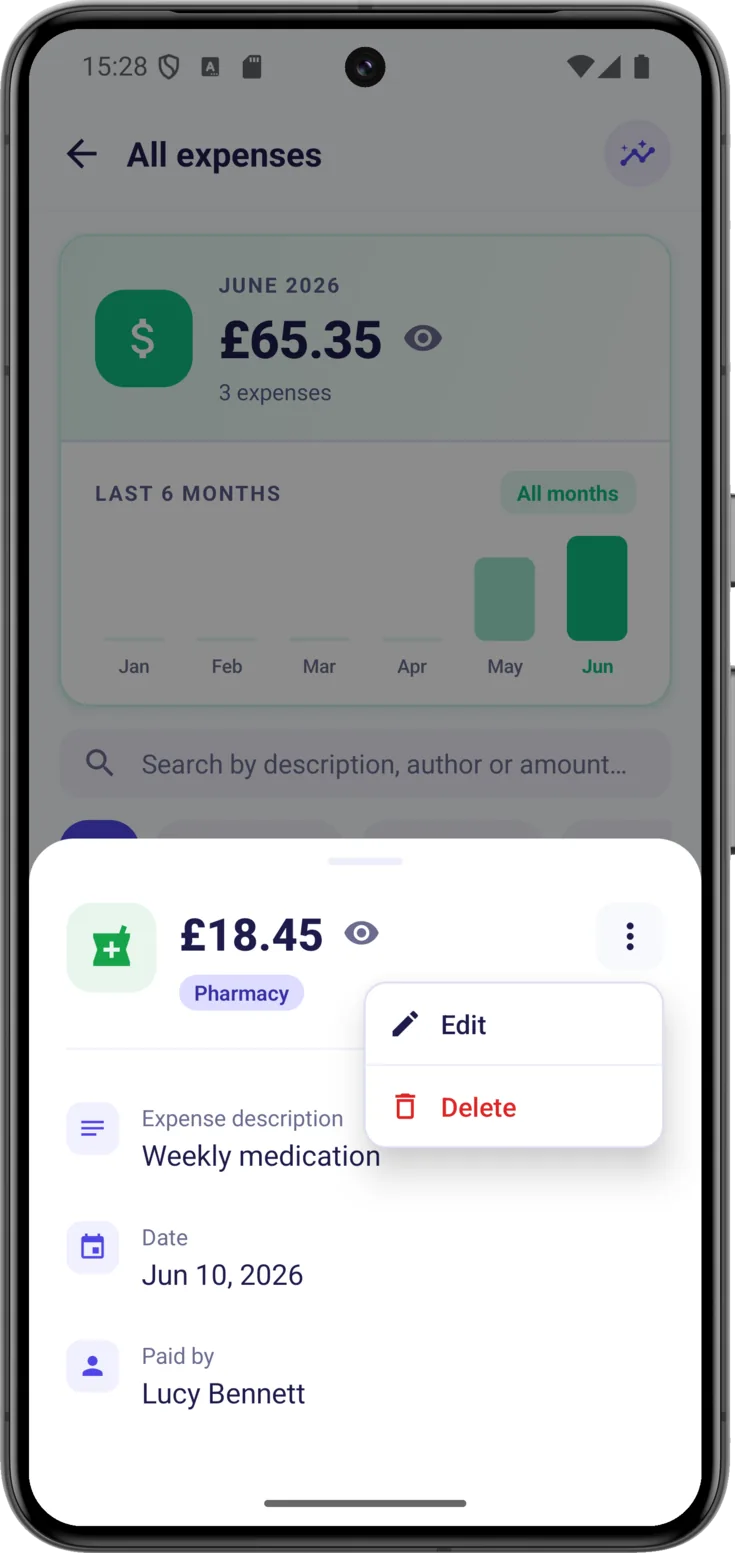
Tapping an expense opens its detail, with the amount, the category, the date, who paid and, if it has one, the photo of the receipt.
The three-dot menu
At the top right of the detail is the menu . If you cannot see it, it has not gone into hiding: it only appears when that expense is one you are allowed to touch. The organizer can touch them all; everyone else, only the ones they wrote down themselves.
There is one situation in which that menu appears for nobody at all, not even for the person who organizes the group, and not even on the expenses that same person wrote down: when the group has a announced closure or is in read-only mode. The expenses can still be seen and exported, but they can no longer be edited or deleted. With a announced closure, on top of that, the spending alerts keep arriving and both «Analytics» and the exports open as normal.
One detail about the «Paid by» field: it keeps the name of whoever really paid, even when that person is no longer in the group and somebody else edits the expense later on. Correcting an amount does not change whose money it was.
From there, «Edit» opens the same form with the details already in place, and «Delete» asks you to confirm before deleting. Read it calmly, because it warns you of something that matters: «The scanned receipt, if any, will also be deleted.» The photo of the receipt is the proof of payment: if you might need it one day, save it somewhere else before deleting the expense.
Analytics and exporting
See where the money goes
The «Analytics» icon is at the top right of the list. It is always visible, but in groups on the Free plan it carries a padlock: when you tap it, instead of opening it explains what it includes.
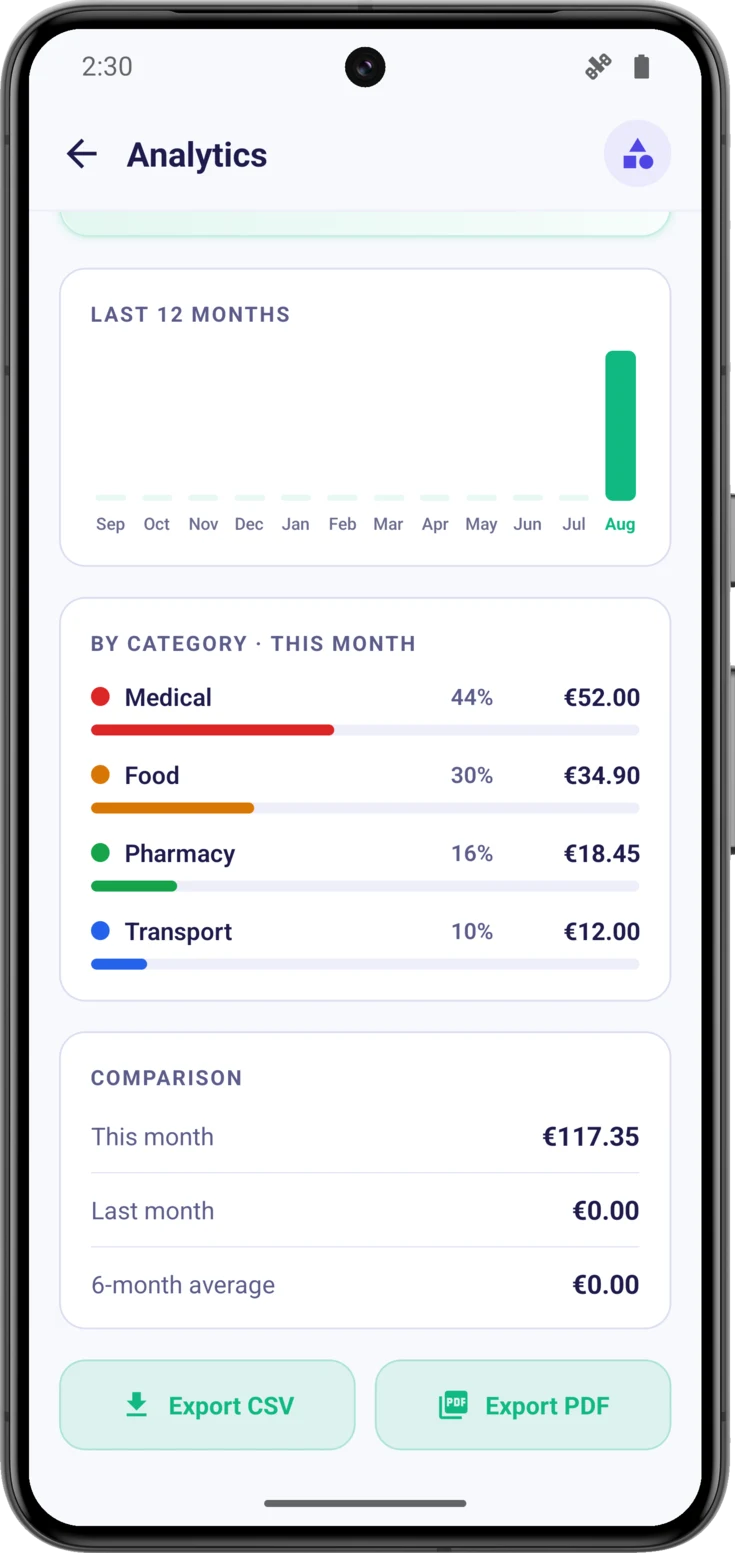
With Plus or Pro the year’s summary opens, with the split by category and the comparison with the previous months, so you know whether you have overdone it this month. The bar chart goes back 6 months with Plus and 12 with Pro.
Take the expenses out of the app
At the end of that same screen —you have to scroll all the way down— are «Export CSV» , to open them in a spreadsheet, and «Export PDF», which generates a report ready to print. The CSV comes with Plus; the PDF belongs to Pro, and that is why it carries a small padlock if your group does not have it.
Bear in mind how far it reaches: the file does not carry the whole history, but at most the 200 most recent expenses of those the group’s plan lets you see. For normal use that is more than enough, but if you have years of history behind you, do not expect the complete file.
Android
The app does not save the file: it opens the Android share menu so that you choose whether to send it by email or WhatsApp, or save it to Drive or to the phone.
iPhone
The app does not save the file: it opens the iPhone share sheet. If you want to save it to the phone, look for «Save to Files».
Spending alerts
Every day CarePilot goes over the group’s accounts and sends an alert to the phone if something is out of the ordinary: a month whose spending is shooting up compared with what is usual, or a one-off, out-of-proportion expense. It is a feature that works on its own and that many people never discover, because it does not appear on any of the expenses screens.
It is not a way of policing anyone: it is about finding out in time, because in caregiving the expenses creep up little by little without anyone noticing until they look at the quarter’s accounts.
Discrete mode
Money is a sensitive matter, and you do not always feel like having the amounts on show on screen —in the waiting room, on the bus—. With discrete mode the amounts are covered with dots (•••) and they reappear as soon as you turn it off; nothing is deleted and nothing is lost.
There are two ways to turn it on: with the «Discrete mode» switch in Settings, which leaves it set until you change it, or with the eye icon that sits next to the amounts in the list, in the detail and in the analytics.
Details worth knowing
The group’s currency cannot be changed. It is chosen when the group is created, taken from the «Currency» in your Settings, and it stays fixed so that the history adds up. Changing it in Settings does not affect the groups that already exist, only the ones you create afterwards: if you need one in another currency, change it first and create the group later.
How much history you see depends on the group’s plan: 14 days with Free, 6 months with Plus and everything with Pro. The expenses that fall outside are not deleted, they simply stop appearing, and they come back if you move up a plan. When there are some, the list itself says so: «3 older expenses hidden».
| Free | Plus | Pro | |
|---|---|---|---|
| 6 predefined categories | ✓ | ✓ | ✓ |
| Expense history | 14 days | 6 months | Unlimited |
| Custom categories | — | — | ✓ |
| Encrypted receipt photo | — | ✓ | ✓ |
| Advanced analytics | — | ✓ | ✓ |
| Export CSV | — | ✓ | ✓ |
| Export PDF | — | — | ✓ |